Is your blurry document giving you a headache? At gmonline.net, we understand the frustration of dealing with unclear documents, especially in the fast-paced world of online gaming and esports. Fortunately, there are numerous online tools and techniques available to enhance image quality and make those blurry documents crystal clear, so you can keep gaming and stay updated! Whether it’s enhancing contrast or using specialized software, clarity is now within reach.
1. What is the Easiest Way to Make a Blurry Document Clear Online?
The easiest way to make a blurry document clear online is by using online document enhancement tools like ScanWritr, which offers features like contrast adjustment, sharpening, and noise reduction to improve image quality quickly. These tools often have user-friendly interfaces, making the process straightforward even for those with limited technical skills.
Expanding on Online Document Enhancement Tools
Online document enhancement tools are designed to address various issues that can make a document appear blurry, such as poor lighting, low resolution, or image noise. Here’s a closer look at how these tools work and why they are so effective:
-
Contrast Adjustment: One of the most common problems with blurry documents is poor contrast, which makes it difficult to distinguish text and other details from the background. Online tools like ScanWritr provide contrast adjustment features that automatically or manually enhance the difference between light and dark areas in the image. This can significantly improve readability.
-
Sharpening: Sharpening tools increase the definition of edges and fine details in an image, making it appear clearer and more focused. This is particularly useful for documents with slightly blurred text or graphics.
-
Noise Reduction: Image noise refers to random variations in brightness or color that can make a document look grainy or unclear. Noise reduction tools work by smoothing out these variations, resulting in a cleaner and more legible image.
-
Resolution Enhancement: Some advanced online tools use sophisticated algorithms to increase the resolution of an image, effectively adding more pixels to the document. This can make a significant difference when dealing with low-resolution scans or photographs.
Why Online Tools Are the Easiest Option
-
Accessibility: Online tools are accessible from any device with an internet connection, whether it’s a PC, Mac, or mobile device. This means you can quickly enhance a blurry document no matter where you are.
-
No Installation Required: Unlike traditional software, online tools don’t require any installation. This saves time and storage space on your device.
-
User-Friendly Interfaces: Many online document enhancement tools are designed with simplicity in mind. They feature intuitive interfaces and step-by-step instructions, making them easy to use even for beginners.
-
Cost-Effective: Many online tools offer free basic features, allowing you to enhance documents without spending any money. For more advanced features, you can often subscribe to a premium plan at an affordable price.
Example: Using ScanWritr
ScanWritr is a prime example of an online tool that simplifies the process of making blurry documents clear. Here’s how you can use it:
- Upload Your Document: Visit the ScanWritr website and upload your blurry document.
- Enhance Contrast: Use the contrast adjustment tool to automatically improve the contrast of your document.
- Sharpen Details: Apply the sharpening tool to increase the clarity of text and graphics.
- Reduce Noise: If necessary, use the noise reduction tool to eliminate grainy textures.
- Download the Enhanced Document: Once you are satisfied with the results, download the enhanced document in your preferred format.
 Clean up document – Contrast enhancement
Alt text: Enhancing document contrast using ScanWritr
2. What Types of Documents Can Be Clarified Online?
Many types of documents can be clarified online, including scanned documents, photographs of documents, PDFs, and even images of text messages. Online tools are versatile and can handle various formats and levels of blurriness.
Expanding on the Versatility of Online Document Clarification
The ability to clarify various types of documents online is a significant advantage, especially in today’s digital age where information comes in many forms. Let’s delve into the specific types of documents that can benefit from online clarification tools:
-
Scanned Documents: Scanned documents often suffer from issues like poor resolution, uneven lighting, and distortions. Online tools can correct these problems by enhancing contrast, sharpening details, and removing shadows.
-
Photographs of Documents: Taking photos of documents with a smartphone is a common practice, but the results can be blurry or skewed. Online tools can straighten the image, improve focus, and enhance text clarity.
-
PDFs: PDFs can sometimes contain scanned images or low-resolution graphics that appear blurry. Online tools can optimize these PDFs by enhancing the embedded images and improving overall readability.
-
Images of Text Messages: Screenshots of text messages are often shared, but they can be difficult to read if the text is small or blurry. Online tools can enlarge the text, sharpen the image, and make the messages more legible.
-
Handwritten Notes: Handwritten notes captured as images can be challenging to decipher due to variations in handwriting and image quality. Online tools can enhance the contrast and clarity of these notes, making them easier to read.
-
Old Documents: Old documents may have faded or become damaged over time. Online tools can help restore these documents by enhancing contrast, removing stains, and improving overall image quality.
How Online Tools Handle Different Document Types
-
Image Processing Algorithms: Online tools use advanced image processing algorithms to analyze and enhance different types of documents. These algorithms can detect text, identify edges, and correct distortions.
-
Format Compatibility: Most online tools support a wide range of file formats, including JPEG, PNG, PDF, and TIFF. This ensures that you can upload and clarify virtually any document regardless of its format.
-
Customizable Settings: Many online tools offer customizable settings that allow you to fine-tune the enhancement process based on the specific characteristics of the document. This ensures optimal results for each type of document.
-
Batch Processing: Some advanced online tools support batch processing, which allows you to clarify multiple documents simultaneously. This can save a significant amount of time when dealing with a large number of files.
Real-World Applications
-
Legal Documents: Clarifying legal documents ensures that all information is accurately readable, which is crucial for compliance and record-keeping.
-
Academic Research: Enhancing research papers and notes helps students and researchers access information more effectively.
-
Business Operations: Improving the clarity of invoices, receipts, and contracts can streamline business processes and reduce errors.
-
Personal Use: Clarifying personal documents like family photos and medical records ensures that important information is preserved for future reference.
3. What Features Should I Look For in an Online Document Clarifier?
Key features to look for in an online document clarifier include contrast adjustment, sharpening tools, noise reduction, cropping, and the ability to handle multiple file formats. These features ensure that you can effectively enhance various types of documents with different levels of blurriness.
Expanding on Essential Features of Online Document Clarifiers
When selecting an online document clarifier, it’s crucial to consider the features that will best address your specific needs. Here’s a detailed look at the key features you should look for:
-
Contrast Adjustment:
- Why it’s important: Enhancing contrast is often the first step in clarifying a blurry document. It increases the difference between light and dark areas, making text and other details more distinguishable.
- What to look for: Tools that offer both automatic and manual contrast adjustment options. Automatic adjustment can quickly improve the overall contrast, while manual adjustment allows you to fine-tune the settings for optimal results.
-
Sharpening Tools:
- Why it’s important: Sharpening tools increase the definition of edges and fine details in an image, making it appear clearer and more focused.
- What to look for: Options to adjust the sharpening intensity. Too much sharpening can introduce artifacts and make the image look unnatural, so it’s important to find a balance.
-
Noise Reduction:
- Why it’s important: Noise refers to random variations in brightness or color that can make a document look grainy or unclear. Noise reduction tools smooth out these variations, resulting in a cleaner image.
- What to look for: Tools that offer different levels of noise reduction. Mild noise reduction can improve the image without sacrificing too much detail, while strong noise reduction is useful for heavily damaged documents.
-
Cropping:
- Why it’s important: Cropping allows you to remove unnecessary elements from the edges of the document, such as borders or background distractions. It also helps to focus on the essential content.
- What to look for: Tools that offer both manual and automatic cropping options. Automatic cropping can detect the edges of the document and crop it accordingly, while manual cropping allows you to precisely define the desired area.
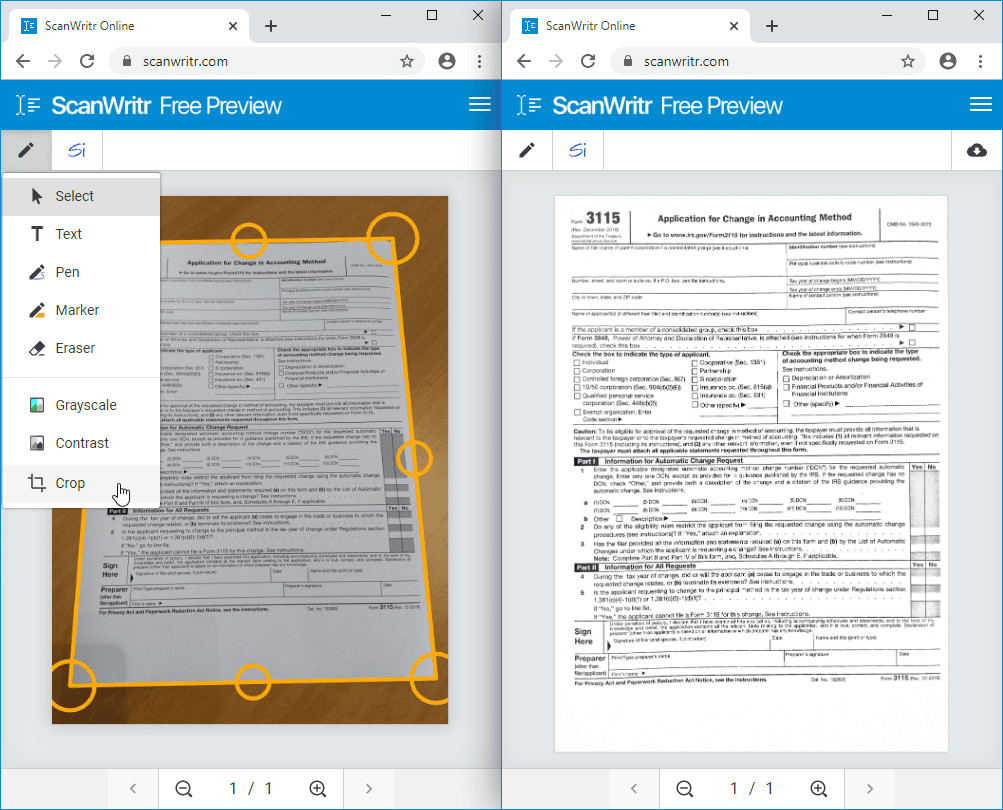 Crop document
Alt text: Cropping a document for perfect formatting.
-
File Format Compatibility:
- Why it’s important: The online tool should support a wide range of file formats, including JPEG, PNG, PDF, TIFF, and others. This ensures that you can upload and clarify virtually any document regardless of its format.
- What to look for: A comprehensive list of supported file formats. The tool should also be able to convert documents between different formats if needed.
-
User-Friendly Interface:
- Why it’s important: A user-friendly interface makes the clarification process more efficient and enjoyable. The tool should be easy to navigate and understand, even for beginners.
- What to look for: Intuitive controls, clear instructions, and helpful tooltips. The interface should be clean and uncluttered, with all the essential features easily accessible.
-
Batch Processing:
- Why it’s important: If you need to clarify multiple documents, batch processing can save a significant amount of time. This feature allows you to upload and process multiple files simultaneously.
- What to look for: The ability to customize the settings for each document in the batch. This ensures that each document is clarified according to its specific needs.
-
Security and Privacy:
- Why it’s important: When uploading sensitive documents, it’s crucial to ensure that the online tool is secure and protects your privacy.
- What to look for: Tools that use encryption to protect your data and have a clear privacy policy. The tool should also delete your documents from its servers after processing.
-
Additional Features:
- Optical Character Recognition (OCR): OCR allows you to convert scanned documents or images into editable text. This is useful for extracting information from documents that are not already in a text-based format.
- Watermark Removal: Some tools can remove watermarks from documents, which is useful for cleaning up copyrighted material.
- Color Correction: Color correction tools can adjust the colors in a document to make it look more natural and vibrant.
- Perspective Correction: Perspective correction tools can fix skewed images by adjusting the perspective to make them look more straight.
4. How Does Contrast Adjustment Help in Making a Document Clear?
Contrast adjustment helps in making a document clear by enhancing the difference between the light and dark areas, making the text and other details more distinguishable from the background. This is particularly useful for documents with faded or uneven lighting.
Expanding on the Science of Contrast Adjustment
Contrast adjustment is a fundamental technique in image processing that plays a crucial role in enhancing the clarity and readability of documents. Here’s a deeper dive into how it works and why it’s so effective:
-
Understanding Contrast:
- Definition: Contrast refers to the difference in luminance or color that makes an object (or its representation in an image or display) distinguishable. In simpler terms, it’s the degree of separation between the darkest and brightest areas of an image.
- Importance: High contrast means there’s a large difference between the light and dark areas, making details stand out. Low contrast means the light and dark areas are similar, making the image look washed out and blurry.
-
How Contrast Adjustment Works:
- Automatic Adjustment: Many online tools offer automatic contrast adjustment features that analyze the image and automatically adjust the contrast levels to achieve optimal results. These tools use algorithms to identify the darkest and brightest pixels in the image and then stretch the contrast range to maximize the difference between them.
- Manual Adjustment: Manual contrast adjustment allows you to fine-tune the contrast levels yourself. This gives you more control over the final result and allows you to tailor the settings to the specific characteristics of the document.
- Histogram Equalization: Some advanced tools use histogram equalization techniques to redistribute the pixel intensities in the image, effectively stretching the contrast range and making details more visible.
-
Benefits of Contrast Adjustment:
- Improved Readability: By enhancing the difference between text and background, contrast adjustment makes the text easier to read, especially in documents with faded or low-contrast text.
- Enhanced Detail: Contrast adjustment can bring out fine details in images and graphics, making them more visible and clear.
- Restored Documents: For old or damaged documents, contrast adjustment can help restore the original appearance by enhancing the contrast and making the text and images more legible.
- Professional Appearance: Adjusting the contrast can give your documents a more professional and polished look, making them more presentable.
-
Best Practices for Contrast Adjustment:
- Start with Automatic Adjustment: Begin by using the automatic contrast adjustment feature to get a quick and easy improvement.
- Fine-Tune Manually: If the automatic adjustment doesn’t produce the desired results, use manual adjustment to fine-tune the contrast levels.
- Avoid Over-Adjustment: Be careful not to over-adjust the contrast, as this can introduce artifacts and make the image look unnatural.
- Consider the Document Type: The optimal contrast levels may vary depending on the type of document. For example, a document with predominantly text may benefit from higher contrast, while a document with detailed graphics may require lower contrast.
-
Examples of Contrast Adjustment in Action:
- Faded Documents: For faded documents, contrast adjustment can significantly improve the readability by making the text darker and more distinct from the background.
- Uneven Lighting: For documents with uneven lighting, contrast adjustment can help to even out the brightness levels and make the text more uniformly visible.
- Low-Contrast Images: For low-contrast images, contrast adjustment can bring out the details and make the image more vibrant and clear.
5. What Role Does Sharpening Play in Document Clarification?
Sharpening plays a crucial role in document clarification by increasing the definition of edges and fine details, making the text and graphics appear clearer and more focused. This is particularly useful for documents with slightly blurred text or graphics.
Expanding on the Art of Sharpening Documents
Sharpening is a powerful image processing technique that enhances the clarity and detail of documents. Here’s a detailed exploration of how sharpening works and its significance in document clarification:
-
Understanding Sharpening:
- Definition: Sharpening is the process of increasing the contrast along edges in an image. This makes the edges appear more defined and the details more prominent.
- Importance: Sharpening can significantly improve the perceived sharpness of an image, making it look clearer and more focused. It’s particularly useful for documents with slightly blurred text or graphics.
-
How Sharpening Works:
- Edge Detection: Sharpening algorithms work by detecting edges in an image. Edges are areas where there is a significant change in brightness or color.
- Contrast Enhancement: Once the edges are detected, the sharpening algorithm increases the contrast along those edges. This makes the dark side of the edge darker and the light side of the edge lighter, resulting in a more defined edge.
- Unsharp Masking: One of the most common sharpening techniques is unsharp masking. This technique involves creating a blurred version of the image (the “unsharp mask”) and then subtracting it from the original image. This enhances the edges and details in the image.
-
Benefits of Sharpening:
- Improved Clarity: Sharpening makes the text and graphics in a document appear clearer and more focused, improving readability.
- Enhanced Detail: Sharpening can bring out fine details in images and graphics, making them more visible and clear.
- Correcting Blur: Sharpening can help to correct minor blurriness caused by camera shake, focus errors, or low-resolution scanning.
- Professional Appearance: Sharpening can give your documents a more professional and polished look, making them more presentable.
-
Best Practices for Sharpening:
- Use Sharpening Sparingly: Over-sharpening can introduce artifacts and make the image look unnatural. It’s important to use sharpening sparingly and to avoid overdoing it.
- Adjust Sharpening Intensity: Most sharpening tools allow you to adjust the sharpening intensity. Start with a low intensity and gradually increase it until you achieve the desired results.
- Sharpen at the End of the Workflow: Sharpening should typically be done at the end of the image processing workflow, after other adjustments like contrast and color correction have been made.
- Consider the Output Medium: The optimal sharpening settings may vary depending on the output medium. For example, images that will be printed may require more sharpening than images that will be viewed on a screen.
-
Examples of Sharpening in Action:
- Blurred Text: For documents with slightly blurred text, sharpening can make the text much easier to read by increasing the contrast along the edges of the letters.
- Soft Images: For images that look soft or lack detail, sharpening can bring out the details and make the image more vibrant and clear.
- Scanned Documents: For scanned documents, sharpening can help to correct minor blurriness and improve the overall clarity of the image.
6. How Can Noise Reduction Improve the Clarity of a Document?
Noise reduction improves the clarity of a document by smoothing out random variations in brightness or color, making the image look cleaner and more legible. This is especially useful for documents with grainy textures or low-quality scans.
Expanding on the Magic of Noise Reduction
Noise reduction is a vital technique in image processing that enhances the clarity and readability of documents. Here’s a detailed look at how noise reduction works and its significance in document clarification:
-
Understanding Noise:
- Definition: In the context of images, noise refers to random variations in brightness or color that can make an image look grainy, speckled, or unclear.
- Causes: Noise can be introduced by various factors, including low-light conditions, high ISO settings on a camera, low-quality scanning, or digital compression.
- Impact: Noise can obscure fine details, reduce readability, and make a document look unprofessional.
-
How Noise Reduction Works:
- Noise Detection: Noise reduction algorithms work by identifying and distinguishing noise from actual image details. This is often done by analyzing the statistical properties of the image.
- Smoothing: Once the noise is detected, the noise reduction algorithm smooths out the variations in brightness or color, effectively reducing the appearance of noise.
- Filtering: Noise reduction algorithms often use filters to remove noise while preserving important image details. Common types of filters include Gaussian filters, median filters, and bilateral filters.
-
Benefits of Noise Reduction:
- Improved Clarity: Noise reduction makes the text and graphics in a document appear cleaner and more legible, improving readability.
- Enhanced Detail: By removing noise, noise reduction can reveal fine details that were previously obscured, making the image more clear.
- Professional Appearance: Noise reduction can give your documents a more professional and polished look, making them more presentable.
- Improved Compression: Noise reduction can improve the efficiency of image compression algorithms, resulting in smaller file sizes without sacrificing image quality.
-
Best Practices for Noise Reduction:
- Use Noise Reduction Sparingly: Over-reduction can blur the image and remove important details. It’s important to use noise reduction sparingly and to avoid overdoing it.
- Adjust Noise Reduction Intensity: Most noise reduction tools allow you to adjust the intensity of the noise reduction. Start with a low intensity and gradually increase it until you achieve the desired results.
- Consider the Document Type: The optimal noise reduction settings may vary depending on the type of document. For example, a document with predominantly text may require less noise reduction than a document with detailed graphics.
- Sharpen After Noise Reduction: After applying noise reduction, it’s often a good idea to sharpen the image to restore any details that may have been lost during the noise reduction process.
-
Examples of Noise Reduction in Action:
- Grainy Scans: For grainy scans, noise reduction can significantly improve the clarity by smoothing out the noise and making the text more legible.
- Low-Light Photos: For photos taken in low-light conditions, noise reduction can remove the noise and reveal the details in the image.
- Compressed Images: For images that have been heavily compressed, noise reduction can reduce the artifacts caused by compression and improve the overall image quality.
7. How Does Cropping Improve the Appearance of a Document?
Cropping improves the appearance of a document by removing unnecessary elements from the edges, such as borders or background distractions, and focusing on the essential content. This results in a cleaner and more professional look.
Expanding on the Art of Cropping Documents
Cropping is a fundamental image editing technique that can significantly enhance the appearance and readability of documents. Here’s a detailed look at how cropping works and its importance in document clarification:
-
Understanding Cropping:
- Definition: Cropping is the process of removing portions of an image to improve its composition, focus attention on the subject, or remove unwanted elements.
- Importance: Cropping can transform a cluttered or distracting image into a clean, focused, and professional-looking document.
-
How Cropping Works:
- Selecting the Area: Cropping tools allow you to select the area of the image that you want to keep. This is typically done by dragging a rectangle or square around the desired area.
- Removing Unwanted Elements: Once the area is selected, the cropping tool removes everything outside of that area, effectively eliminating unwanted elements from the image.
- Adjusting Aspect Ratio: Some cropping tools allow you to adjust the aspect ratio of the cropped image. This can be useful for fitting the image into a specific frame or format.
-
Benefits of Cropping:
- Improved Composition: Cropping can improve the composition of an image by removing distracting elements and focusing attention on the subject.
- Enhanced Focus: Cropping can enhance the focus of an image by removing unnecessary elements and drawing the viewer’s eye to the main subject.
- Professional Appearance: Cropping can give your documents a more professional and polished look, making them more presentable.
- Reduced File Size: Cropping can reduce the file size of an image by removing unnecessary pixels.
-
Best Practices for Cropping:
- Crop Purposefully: Crop with a specific goal in mind, such as improving the composition, enhancing the focus, or removing unwanted elements.
- Consider the Aspect Ratio: Choose an aspect ratio that is appropriate for the document and the intended use.
- Leave Some Margin: Avoid cropping too tightly, as this can make the image look cramped and uncomfortable. Leave some margin around the subject to give it room to breathe.
- Straighten the Image: Before cropping, make sure the image is straight. Crooked images can be distracting and unprofessional.
-
Examples of Cropping in Action:
- Removing Borders: For scanned documents, cropping can be used to remove the borders and edges of the scan, resulting in a cleaner and more professional look.
- Focusing on Text: For documents with a lot of empty space, cropping can be used to focus on the text and make it more readable.
- Removing Distractions: For documents with distracting elements in the background, cropping can be used to remove those elements and focus attention on the subject.
8. Can I Convert a Blurry Document to Text Using OCR?
Yes, you can convert a blurry document to text using Optical Character Recognition (OCR) technology, which analyzes the image and extracts the text. However, the accuracy of OCR depends on the clarity of the original document; a clearer document will yield more accurate results.
Expanding on the Power of OCR Technology
Optical Character Recognition (OCR) is a transformative technology that converts images of text into machine-readable text. Here’s a comprehensive look at how OCR works and its capabilities in converting blurry documents:
-
Understanding OCR:
- Definition: OCR is the process of converting images of text (such as scanned documents or photographs of text) into editable, searchable text data.
- Importance: OCR enables you to extract text from images, making it possible to edit, search, and manipulate the text in a digital format.
-
How OCR Works:
- Image Preprocessing: The first step in OCR is image preprocessing, which involves cleaning up the image to improve the accuracy of the OCR process. This may include noise reduction, contrast adjustment, and skew correction.
- Text Detection: The OCR software then analyzes the image to identify areas that contain text. This is typically done by looking for patterns of dark and light areas that resemble characters.
- Character Recognition: Once the text areas have been identified, the OCR software attempts to recognize the individual characters. This is done by comparing the shapes of the characters to a library of known characters.
- Text Reconstruction: Finally, the OCR software reconstructs the text by arranging the recognized characters in the correct order.
-
Benefits of OCR:
- Text Extraction: OCR allows you to extract text from images, making it possible to edit, search, and manipulate the text in a digital format.
- Improved Accessibility: OCR can improve the accessibility of documents for people with disabilities by converting them into a format that can be read by screen readers.
- Increased Efficiency: OCR can increase the efficiency of document processing by automating the task of data entry.
- Reduced Storage Space: OCR can reduce the storage space required for documents by converting them into a text-based format.
-
Challenges of OCR with Blurry Documents:
- Reduced Accuracy: The accuracy of OCR depends on the clarity of the original document. Blurry or distorted documents can be difficult for OCR software to recognize, resulting in lower accuracy.
- Increased Processing Time: Blurry documents may require more processing time to analyze and recognize, slowing down the OCR process.
- Need for Preprocessing: Blurry documents may require more extensive preprocessing to improve the accuracy of the OCR process.
-
Tips for Improving OCR Accuracy with Blurry Documents:
- Enhance Image Quality: Before running OCR, try to enhance the quality of the image by using tools to adjust the contrast, sharpen the image, and reduce noise.
- Use High-Quality OCR Software: Choose OCR software that is specifically designed to handle blurry or distorted documents.
- Proofread the Results: After running OCR, carefully proofread the results to correct any errors.
9. Are There Free Online Tools to Make a Blurry Document Clear?
Yes, there are several free online tools available to make a blurry document clear. These tools often offer basic features like contrast adjustment, sharpening, and cropping. However, for more advanced features, you may need to consider a paid subscription.
Exploring the World of Free Online Document Clarifiers
The internet offers a plethora of free tools that can help you enhance the clarity of blurry documents. While these tools may not have all the bells and whistles of their paid counterparts, they can be surprisingly effective for basic document clarification tasks. Here’s a detailed overview of what you can expect from free online document clarifiers:
-
Basic Features:
- Contrast Adjustment: Most free online tools offer basic contrast adjustment features that allow you to increase or decrease the difference between light and dark areas in the image. This can help to make the text more readable.
- Sharpening: Many free tools also offer sharpening features that increase the definition of edges and fine details in the image. This can help to make the image look clearer and more focused.
- Cropping: Cropping is another common feature that allows you to remove unwanted elements from the edges of the image. This can help to improve the composition of the document and focus attention on the subject.
-
Limitations:
- Limited Functionality: Free online tools typically offer a limited set of features compared to paid tools. They may not have advanced features like noise reduction, color correction, or perspective correction.
- Ad Support: Many free online tools are supported by advertising. This means you may see ads while using the tool, which can be distracting.
- File Size Limits: Some free tools may have file size limits, which can prevent you from uploading large documents.
- Watermarks: Some free tools may add watermarks to the processed documents.
-
Popular Free Online Tools:
- ScanWritr: ScanWritr is a versatile online tool that offers a range of features for editing and enhancing documents, including contrast adjustment, sharpening, and cropping.
- Online Image Editor: Online Image Editor is a free tool that offers a variety of image editing features, including contrast adjustment, sharpening, and noise reduction.
- Fotor: Fotor is a popular online photo editor that offers a range of features for enhancing images, including contrast adjustment, sharpening, and color correction.
- LunaPic: LunaPic is a free online photo editor that offers a variety of image editing features, including contrast adjustment, sharpening, and noise reduction.
- Image Online.co: Image Online.co is a free online tool that offers a variety of image editing features, including contrast adjustment, sharpening, and cropping.
-
When to Consider Paid Tools:
- Advanced Features: If you need advanced features like noise reduction, color correction, or perspective correction, you may need to consider a paid tool.
- Large Documents: If you need to process large documents, you may need a paid tool that can handle larger file sizes.
- No Watermarks: If you don’t want watermarks on your processed documents, you will need to use a paid tool.
- Professional Use: If you are using the tool for professional purposes, you may want to invest in a paid tool to ensure high-quality results.
10. What Are the Best Practices for Scanning Documents to Avoid Blurriness?
Best practices for scanning documents to avoid blurriness include using a high-resolution scanner, ensuring proper lighting, keeping the document flat and still, and cleaning the scanner glass regularly. These practices will help produce clear and legible scans.
Expanding on Achieving the Perfect Scan
Scanning documents is a common task in both personal and professional settings. However, achieving a clear and legible scan requires attention to detail and adherence to best practices. Here’s a comprehensive guide to help you avoid blurriness and produce high-quality scans:
-
Use a High-Resolution Scanner:
- Importance: The resolution of the scanner determines the amount of detail that is captured in the scan. A high-resolution scanner will capture more detail and produce a clearer image.
- Recommendation: Use a scanner with a resolution of at least 300 DPI (dots per inch) for text documents and 600 DPI for images.
-
Ensure Proper Lighting:
- Importance: Proper lighting is essential for achieving a clear and legible scan. Poor lighting can result in shadows, glare, and uneven brightness, which can make the scan look blurry.
- Recommendation: Use a scanner with a built-in light source. If you are using a flatbed scanner, make sure the room is well-lit and avoid placing the scanner near windows or other sources of direct light.
-
Keep the Document Flat and Still:
- Importance: Any movement of the document during the scanning process can result in blurriness. It’s important to keep the document flat and still while it is being scanned.
- Recommendation: Use a document feeder if you are scanning multiple pages. If you are using a flatbed scanner, make sure the document is properly aligned and pressed flat against the glass.
-
Clean the Scanner Glass Regularly:
- Importance: Dust, dirt, and fingerprints on the scanner glass can cause the scan to look blurry. It’s important to clean the scanner glass regularly to ensure that the scan is clear.
- Recommendation: Use a soft, lint-free cloth to clean the scanner glass. Avoid using harsh chemicals or abrasive cleaners.
-
Adjust Scanner Settings:
- Importance: Most scanners allow you to adjust various settings, such as contrast, brightness, and color. Adjusting these settings can help to improve the quality of the scan.
- Recommendation: Experiment with different settings to find the ones that work best for your documents. If you are scanning a black and white document, set the scanner to black and white mode to reduce file size.
-
Use Image Enhancement Software:
- Importance: Even with the best scanning practices, some scans may still require some image enhancement. Image enhancement software can be used to adjust the contrast, sharpen the image, and reduce noise.
- Recommendation: Use a reputable image enhancement software package, such as Adobe Photoshop or GIMP.
-
Store Documents Properly:
- Importance: How you store your documents can also affect their clarity over time.
- Recommendation: Store documents in a cool, dry place away from direct sunlight. Use acid-free paper and archival-quality sleeves to protect documents from damage.
By following these best practices, you can ensure that your scanned documents are clear, legible, and of the highest possible quality. Remember, at gmonline.net, we are dedicated to providing you with the best tips and tools to enhance your digital experience.
FAQ: Making Blurry Documents Clear Online
Here are some frequently asked questions about making blurry documents clear online:
-
Can I improve the resolution of a blurry document online?
Yes, some online tools offer resolution enhancement features that can increase the number of pixels in the image, making it appear clearer.
-
Is it safe to upload sensitive documents to online clarifiers?
Ensure the online tool uses encryption and has a clear privacy policy. Look for tools that delete documents from their servers after processing.
-
What if my document has both blurriness and color issues?
Use online tools that offer both sharpening and color correction features to address both issues simultaneously.
-
Can I use my smartphone to scan documents clearly?
Yes, but use a scanning app with features like auto-cropping and perspective correction for best results.
-
How do I handle documents with handwritten text?
Use OCR software that is optimized for handwritten text recognition, as it can be more challenging than printed text.
-
What is the best file format for scanning documents?
PDF is generally the best format for scanned documents as it preserves formatting and is widely compatible.
-
How can I correct perspective distortion in scanned documents?
Use online tools with perspective correction features to adjust the image and make it look more straight.
-
Are there any AI-powered tools to clarify blurry documents?
Yes, some advanced online tools use AI algorithms to automatically enhance and clarify blurry documents.
-
Can I clarify multiple blurry documents at once?
Look for online tools that offer batch processing, allowing you to clarify multiple documents simultaneously.
-
What should I do if the online tool doesn’t produce satisfactory results?
Try a different online tool or consider using professional image editing software for more advanced options.
Ready to dive deeper into the world of online gaming and esports? Head over to gmonline.net now to catch up on the latest news, get expert tips, and join our vibrant community! Don’t miss out – your next adventure awaits.
Address: 10900 Wilshire Blvd, Los Angeles, CA 90024, United States
Phone: +1 (310) 235-2000
**